Coding Your First Slack Webhook
Sending a Message by Coding Your First Slack Web Hook

Hello my name is Andrew I am an aspiring Developer Advocate and this Blog focuses on development using popular API’s such as, Slack,YouTube,Discord, and much more!
Looking to add some functionality to your Slack workspace using bots? What about an app that grabs specific YouTube videos from your favourite content creator ? Hopefully this Blog has the answers for you!
The idea is to provide some insight how to utilize publicly available API’s. If you’re a beginner looking to add something to your GitHub or even learning how it all works. Check out this Blog.
What Is a Webhook ?
Before you code a Web Hook, you might want to know "What is a Slack Webhook?" According to Slack :
"Incoming Webhook are a simple way to share information from external sources with your workspace." - Some really smart guy over at Slack
Now Slack has a pretty clear explanation,but let's break it down a little bit more and use a mail box as an example, and break down what a Webhook actually is:
You have a mail box. Whenever someone posts a letter to you, it goes to your post office first and then the post office sends it to you by putting it in your mailbox
Here, The post office is a Webhook
The post office receiving the letter is the event trigger
Your mail box/address is the "call back URL" configured with the Webhook (post office) - this is how the post office knows where to send the letters
Hopefully that clears things up a bit about what a Webhook is, and more importantly how Slack views a Webhook, and by now you might be thinking of all the use cases around creating a Webhook, let's get into it!
Creating Your Slack Workspace

Creating a free Slack Workspace is pretty straight forward, here are the steps taken from Slack's super handy Help Center :
Head over to Slack
Enter your email address and click Continue, or continue with Apple or Google.
Check your email for a confirmation code.
Enter your code, then click Create a Workspace and follow the prompts.
Creating a Web Hook URL in the Slack App Management
Let's head over to Slack's app page
Create a new App, name your Webhook, and select your newly created Workspace.
On the left hand side below features click on Incoming Webhook and toggle it on!
Scroll down and click Click Add New Webhook to Workspace.
Pick a channel you want to post in, and click Allow
- Note, a Webhook can only be posted in the channel you selected.
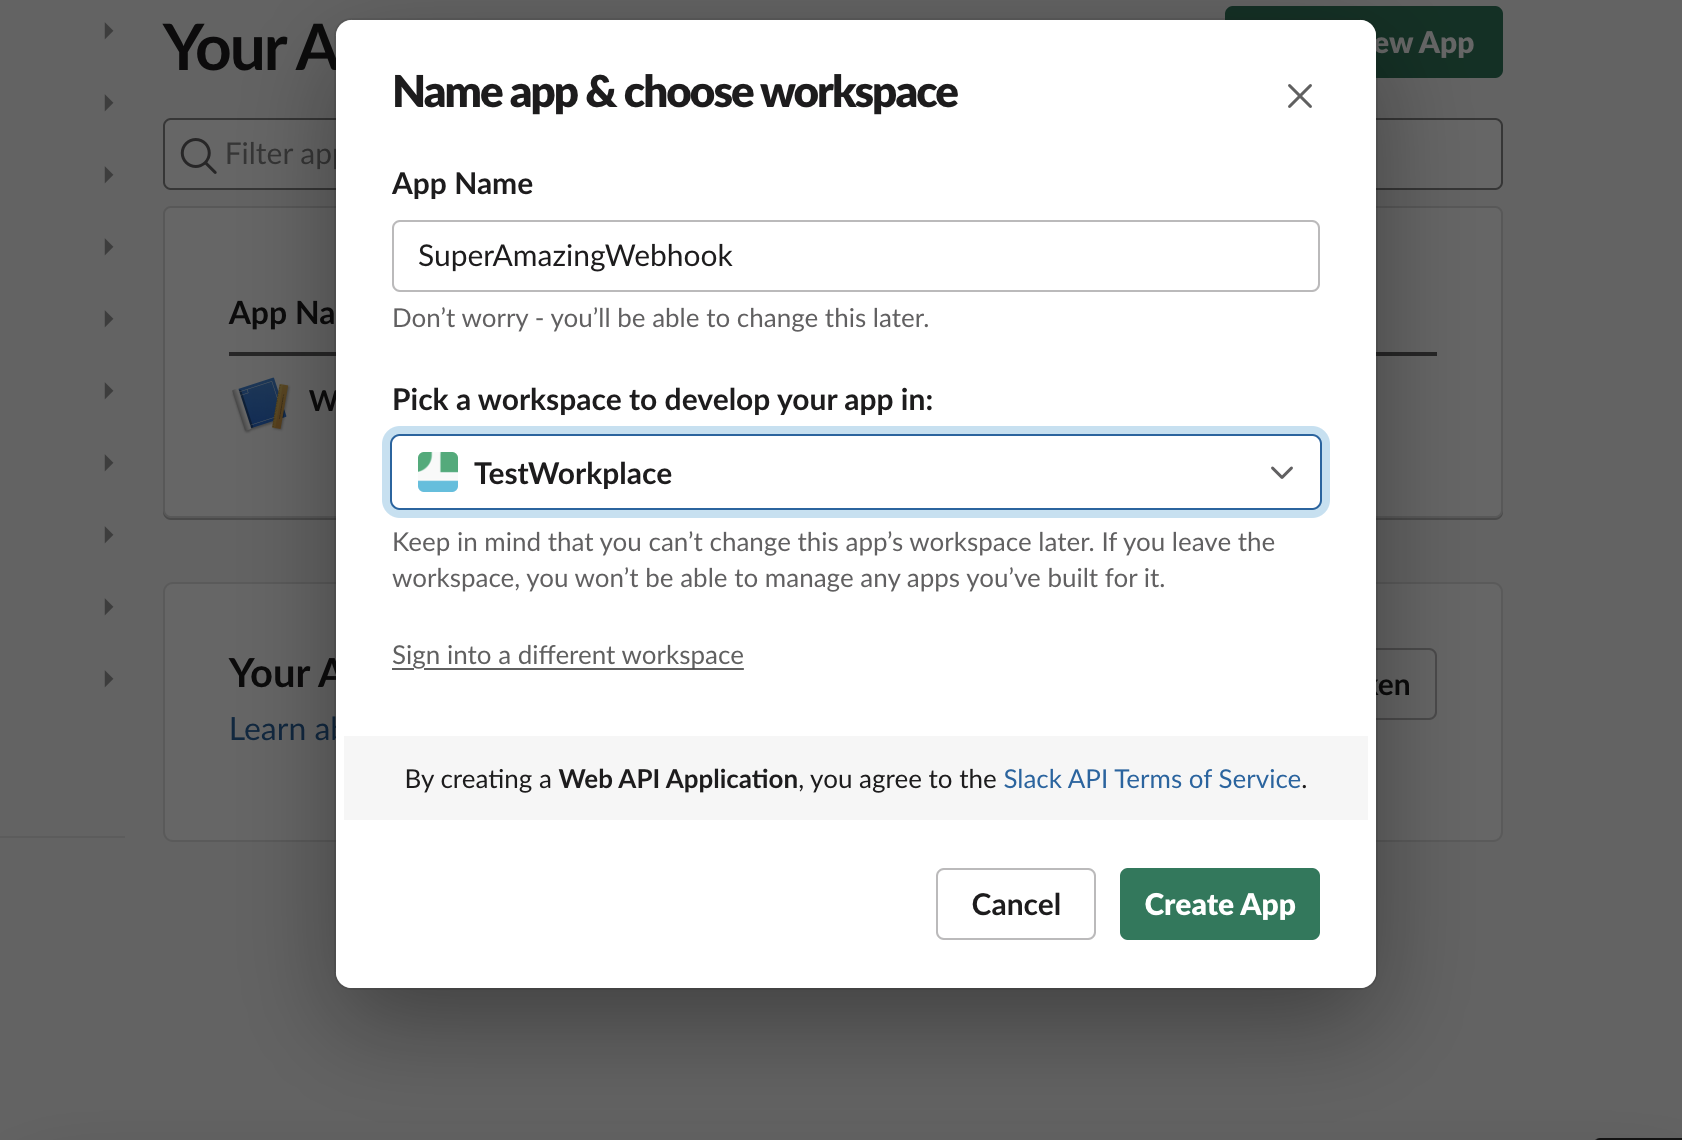
Creating a post With Our New Webhook URL
Finally we get to the meat and potatoes(or if you prefer the Beans and legumes)!
Before we get started, there's a couple things to note.
This article is about using Slack's Webhook, so I'm going to use Postman to simplify the post request, instead of creating a full program using fetch, axios,etc.
You can install Postman by going to their website here.
Perfect! Now that we have Postman installed, we'll enter our Webhook URL into the input box that is asking for a request URL. We'll change the type of request from GET to POST, and finally in the "Headers" tab we'll make sure we set a Content-Type to application/json
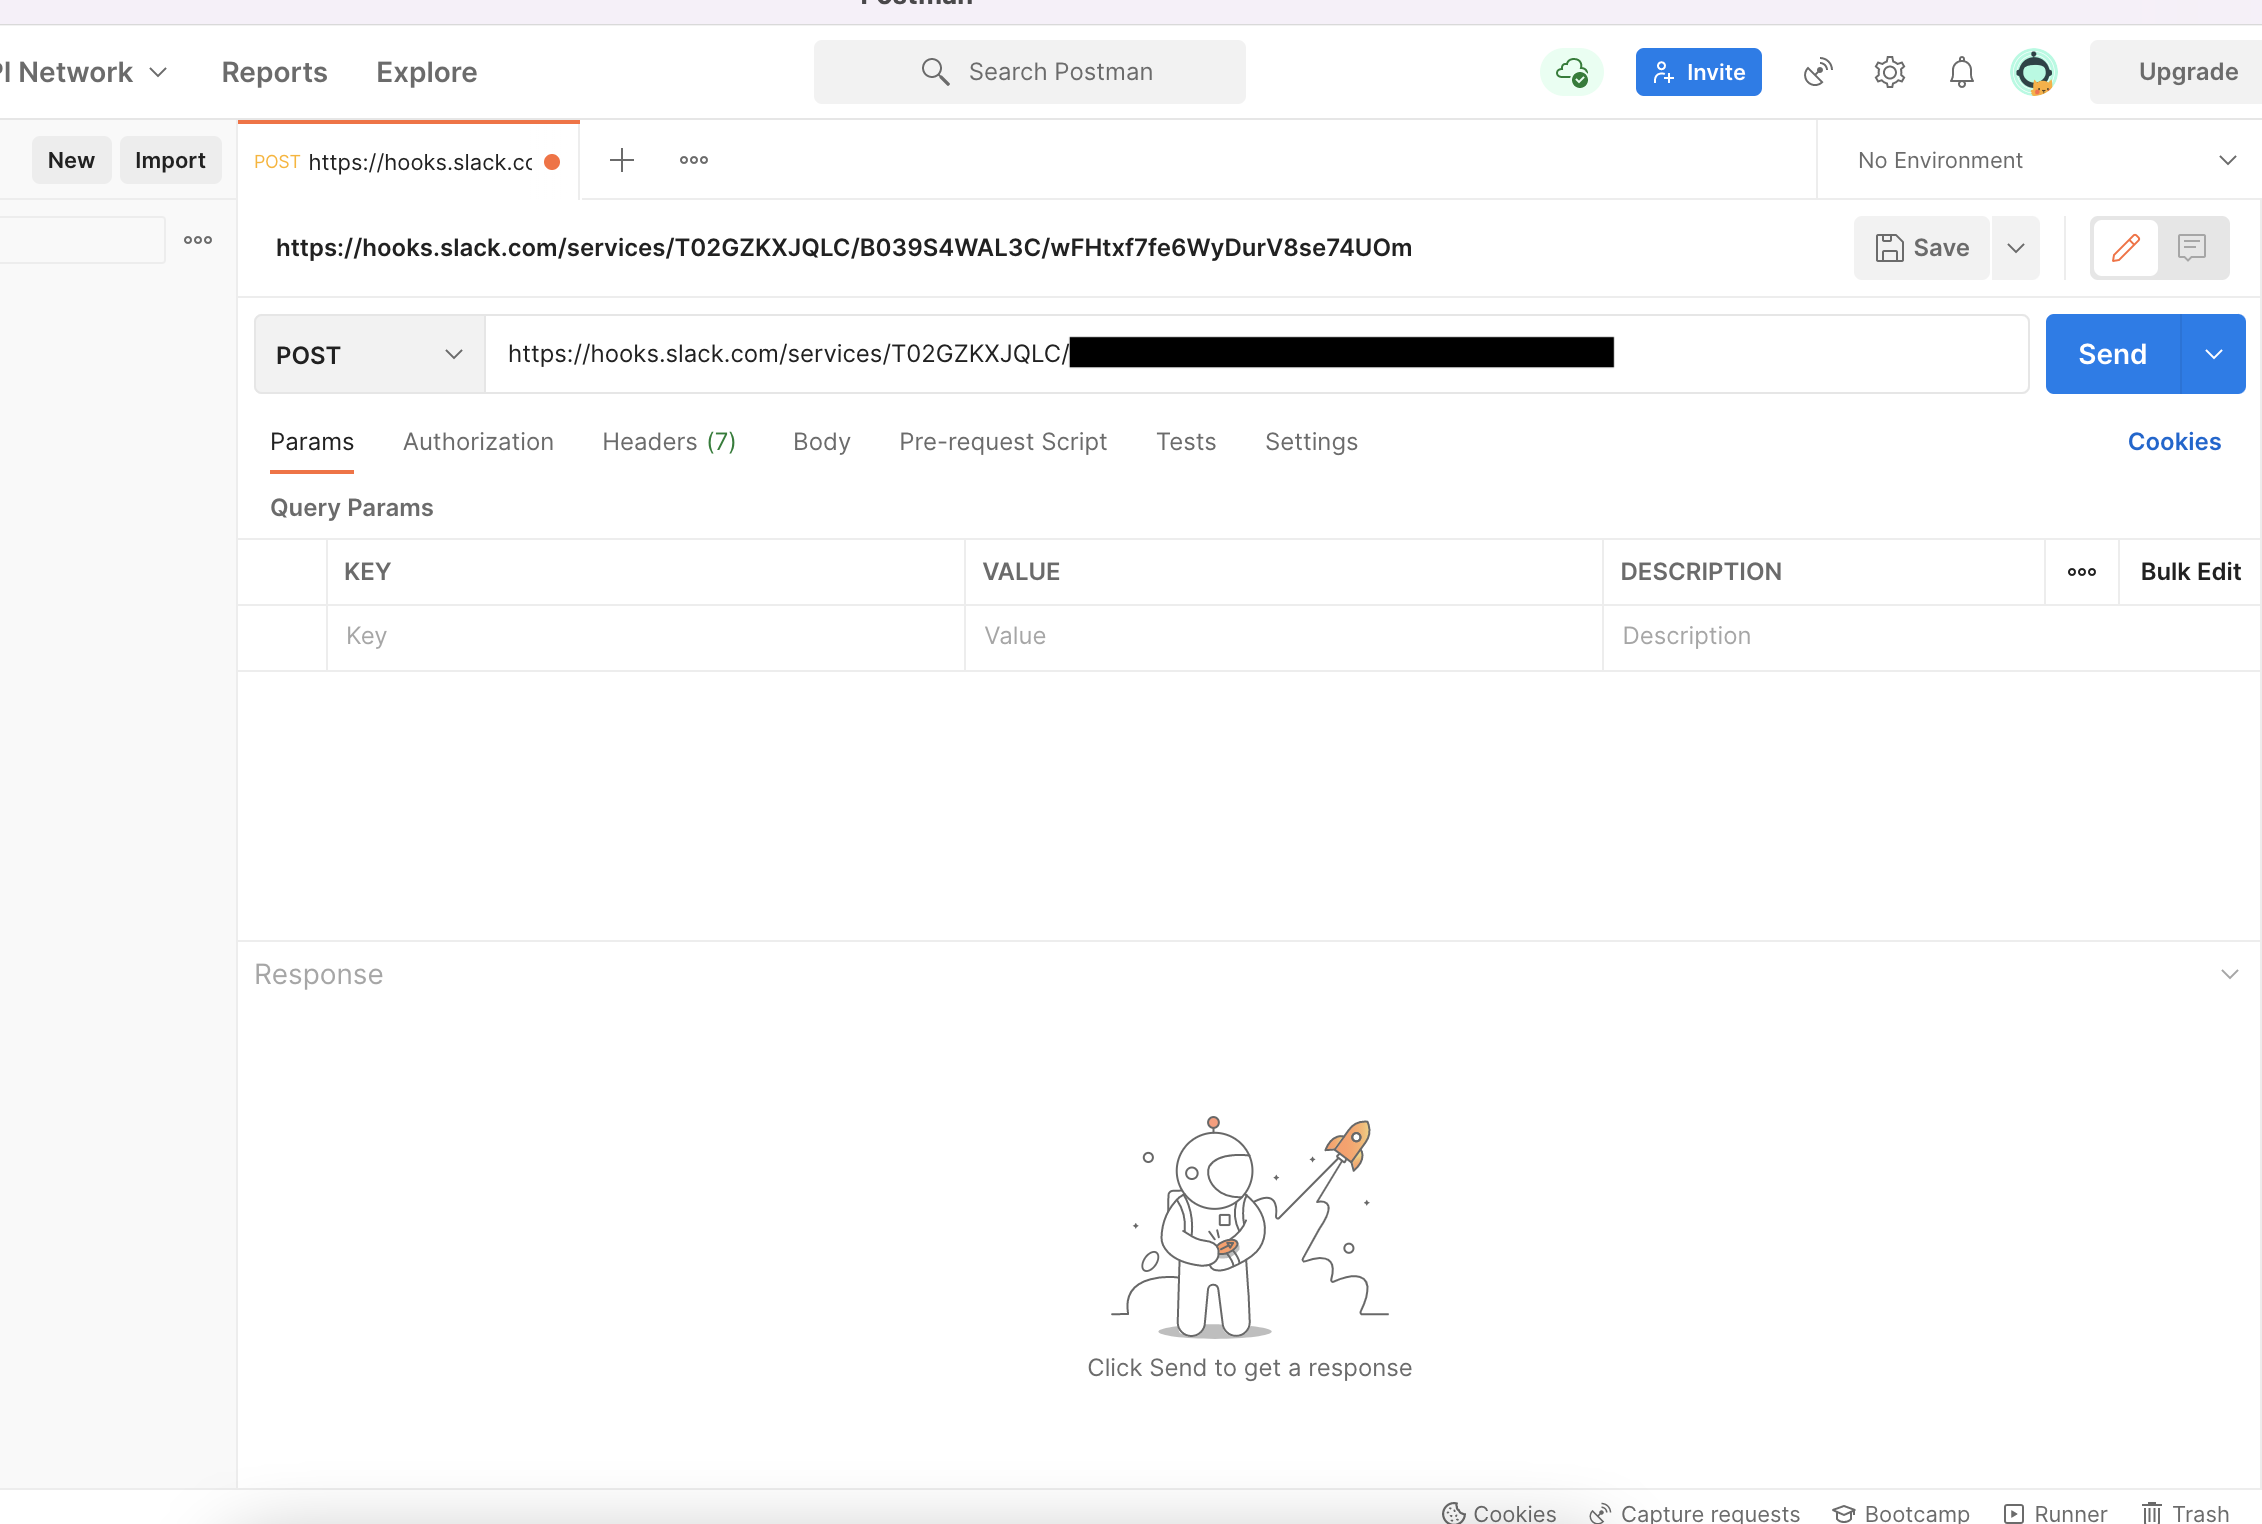
Now that we have everything set up, let's write a little bit of JSON, and make sure our Web Hook actually works.
We'll click on the Body tab and click on raw we'll write a little bit of JSON to welcome our Webhook into the world!
{
"text":"Hello World!"
}
Now all we do is hit Send, and with that, if you check your Workspace, you should have a new notification, I wonder what could it be ?
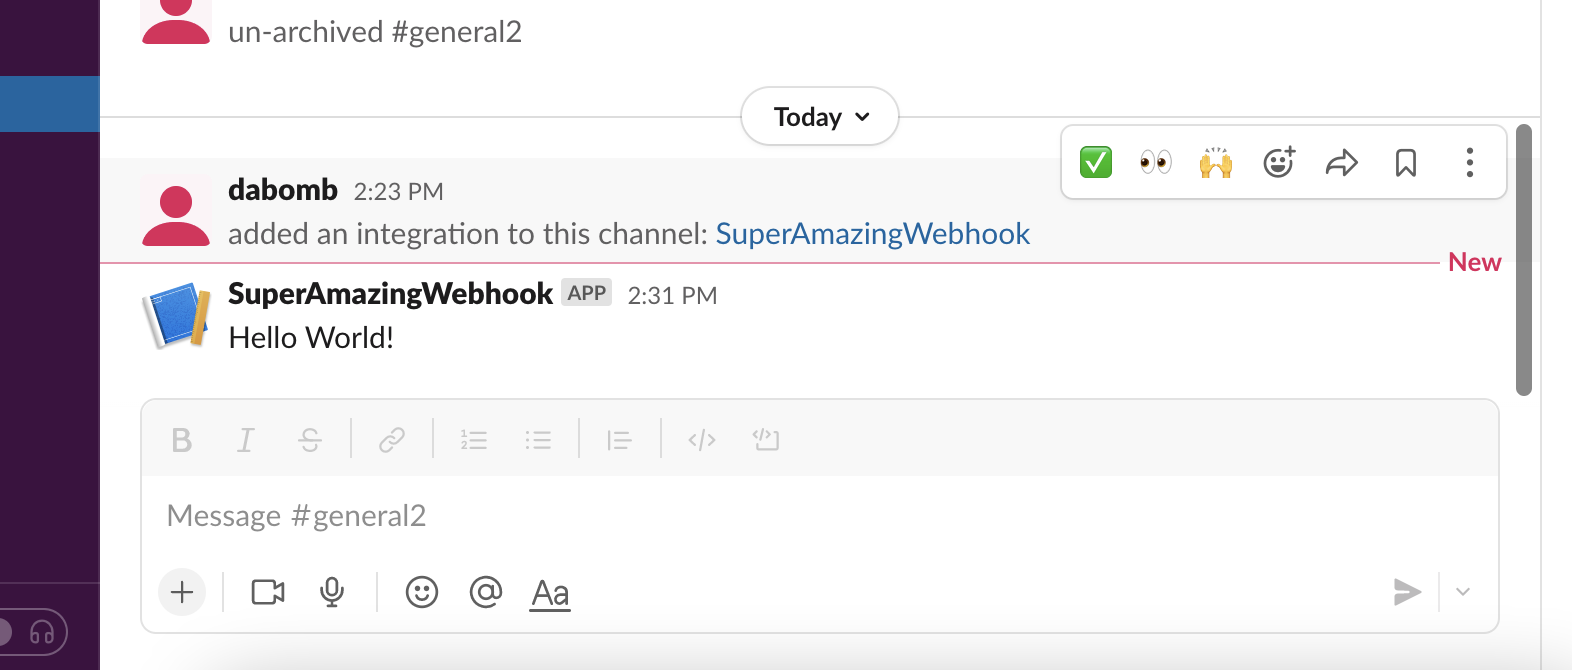
Awesome! Now our Webhook works, but the text looks a little plain doesn't it ? There's a solution for that, Slack has this cool tool called Block Kit, let's check it out.
With Block kit, we can make our posts a lot more appealing, so let's do that. Here we can create a expense form with an approval / deny button. I found this on Slack's Block kit builder site, which is an amazing resource.
{
    "blocks": [
        {
            "type": "section",
            "text": {
                "type": "mrkdwn",
                "text": "You have a new request:\n*<fakeLink.toEmployeeProfile.com|Fred Enriquez - New device request>*"
            }
        },
        {
            "type": "section",
            "fields": [
                {
                    "type": "mrkdwn",
                    "text": "*Type:*\nComputer (laptop)"
                },
                {
                    "type": "mrkdwn",
                    "text": "*When:*\nSubmitted Aut 10"
                },
                {
                    "type": "mrkdwn",
                    "text": "*Last Update:*\nMar 10, 2015 (3 years, 5 months)"
                },
                {
                    "type": "mrkdwn",
                    "text": "*Reason:*\nAll vowel keys aren't working."
                },
                {
                    "type": "mrkdwn",
                    "text": "*Specs:*\n\"Cheetah Pro 15\" - Fast, really fast\""
                }
            ]
        },
        {
            "type": "actions",
            "elements": [
                {
                    "type": "button",
                    "text": {
                        "type": "plain_text",
                        "emoji": true,
                        "text": "Approve"
                    },
                    "style": "primary",
                    "value": "click_me_123"
                },
                {
                    "type": "button",
                    "text": {
                        "type": "plain_text",
                        "emoji": true,
                        "text": "Deny"
                    },
                    "style": "danger",
                    "value": "click_me_123"
                }
            ]
        }
    ]
}
We'll go back to Postman and write this code down, and hit the Send button one more time!
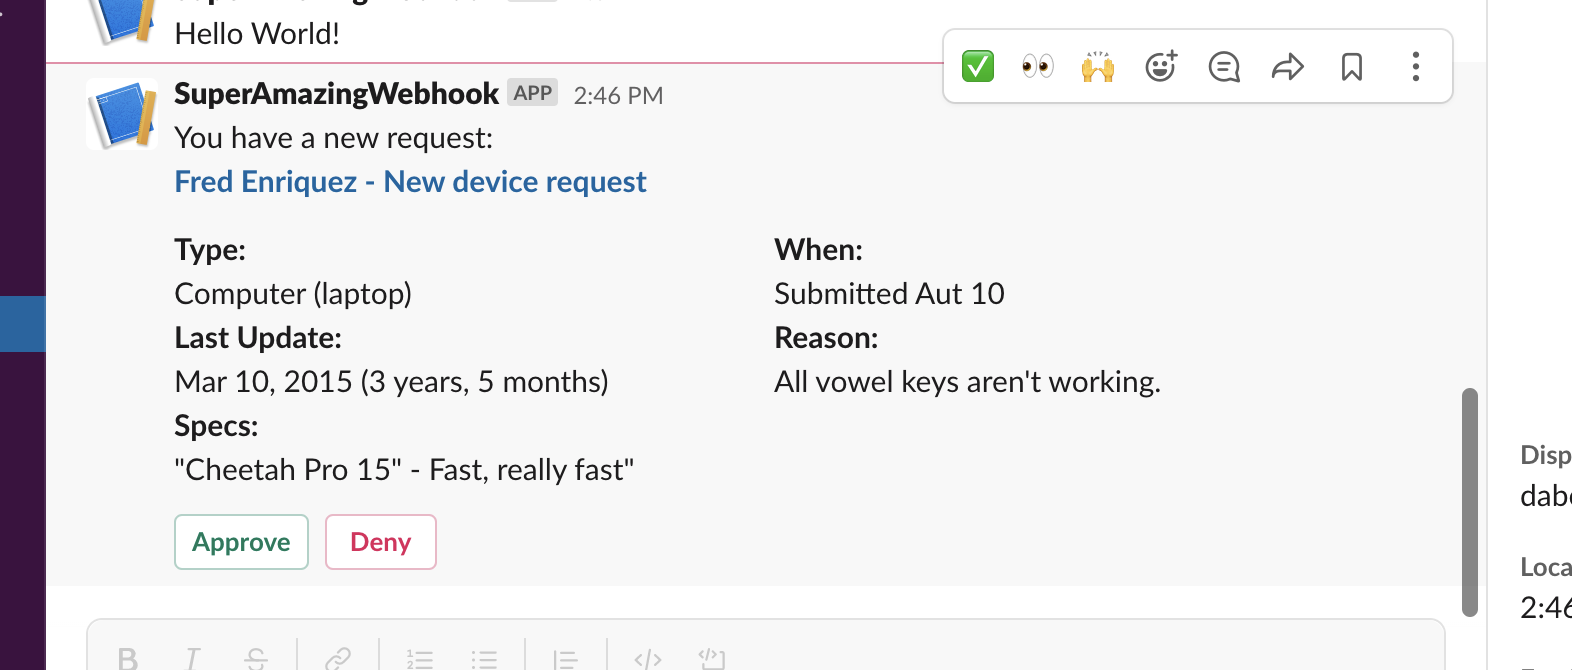
That looks a lot better than our previous example. Hopefully by now you understand how to create a Webhook, use a Webhook using something like Postman, and realize Slack's Block kit builder can create beautiful layouts.
I hope you enjoyed the read!
